
Revamp Your Code Reviews with GitLens
See how GitLens improves VS Code with Revision Navigation, CodeLens, and more, making code reviews more effective and collaborative.
10 Popular VS Code Color Themes in 2024
Uncover a world of color and style with our top picks for VS Code themes designed to enhance aesthetics, reduce eye strain, and more.
Smoother Developer Onboarding and Git Education with GitKraken
GitKraken enhances developer onboarding and simplifies learning Git, making it accessible through interactive tools and free resources.

Best Jira Plugins for Development Teams in 2024
Dive into the top Jira add-ons for software teams in 2024, featuring Git Integration for Jira, Team Insights for Jira, and more – all to refine project execution and teamwork.

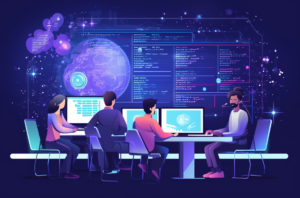
Elevating Code Reviews: Strategies for Distributed Teams
Dive into the shift in code reviews with remote work, and how tools like GitKraken and practical strategies can transform this essential process for distributed teams.
Minimizing Distractions and Maximizing Productivity with GitLens
Discover how GitLens enhances developer productivity in VS Code by streamlining workflows and minimizing distractions.
Essential Tips to Enhance Your Pull Request Workflow
Unlock smoother, more efficient PR workflows with insights from GitKraken’s latest workshop – transform how your team collaborates on code.
Best Git Client for Windows in 2024
Browse through the leading Git Clients for Windows, designed for streamlined project management, efficient code tracking, and seamless collaboration.

4 Hurdles of Multi-Repo Management (and How to Solve Them)
Discover some of the common complexities of multi-repo management, plus practical tips and tools to simplify your workflow.
Elevating Dev Teams: GitKraken and JetBrains Share Insights from 150,000 Developers
Check out GitKraken and JetBrain’s newest report to gain insights into the ideal team size, productivity barriers, integrated tooling and more.
Keep Repos Organized Within the Terminal: GitKraken CLI Tutorial & Use Case
Unveil the power of GitKraken CLI for terminal enthusiasts: Simplify your Git workflow, tackle cloning issues, manage multiple projects with ease, and more – with GitKraken Ambassador Kevin Bost.

Elevate your Git Workflow: Unhandled Exception Podcast
Dive into the heart of GitKraken Client and GitLens with Justin Roberts and Eric Amodio.
Navigating GitHub Desktop: A Guide for Every OS
Explore the ins and outs of GitHub Desktop, with a special look at GitKraken Client as a powerful alternative for cross-platform developers.
Best Command Line Tool for GitHub Issues and Pull Requests
See how the GitKraken CLI can help manage GitHub Issues and PRs, making devs’ command line experience smoother and more organized.
8 Powerful CLI Extensions on GitHub in 2024
Elevate your CLI game with GitHub extensions: Manage Git repos, develop Chrome extensions, and more.

10 Things I Wish I Knew When First Learning VS Code
Unlock VS Code’s full potential: Tips, extensions, shortcuts, and hidden gems to streamline your coding experience.
5 Reasons Why GitKraken Client is the Ultimate Tool for GitHub Users
Boost your GitHub workflow with GitKraken Client’s user-friendly interface and powerful features for more efficient development.
GitHub Pull Request Management with GitKraken Client
Enhance PR handling with GitKraken Client and GitHub. Discover time-saving features and tips for smoother development.

Bitbucket Server Support is Ending. Why You Should Embrace a Cloud or Data Center Solution.
Ensure a secure & efficient migration to an advanced development environment with Git Integration for Jira.
Get Things Done with GitKraken: 4 Must-Know Features
Discover how these GitKraken Client features can help you save time and prevent potential coding headaches.

Introducing GitKraken.dev: Everything GitKraken, Now In Your Browser
GitKraken.dev brings GitKraken’s powerful tools to your browser, enhancing coding convenience and efficiency.

From Beginner to Pro: The Three Stages of Git Adoption
Discover how progressing through three key stages of Git adoption can elevate your version control skills and benefit your team.

Jira Sprint Planning Insights: Elevating Agile Project Management
Agile methodology meets Jira: Transforming project management through innovative sprint planning and enhanced teamwork.
GitKraken CLI Complete Guide: Elevate Your Git Collaboration Experience
Elevate your Git workflow with GitKraken CLI, the perfect blend of simplicity and power for collaborative software development.
Git For Everyone, Even You!
Move beyond USB keys and sync folders. Discover how Git streamlines file collaboration, with easy tips and user-friendly tools.

Just Try: Inspiration for Your Journey as a World-Changing Developer
Discover how your coding skills can pioneer new digital realms and turn ideas into impactful realities.

Monorepos Explained: Examining the Benefits, Costs, and Tools
Discover monorepos: balancing streamlined development and the complexities of managing large, unified codebases.

Leading Indicators of Success and Risk in a Development Plan
Explore essential indicators for software development success, including team-related metrics, adaptability through the “age of the story,” and defect origin analysis.
Nix: The Ultimate Solution for Streamlining Development Environments
Discover the power of Nix in simplifying the setup and maintenance of development environments.
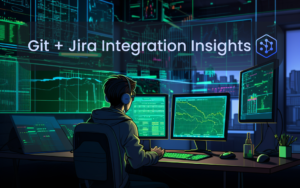
The Power of Fusion: Enhancing Productivity with Jira Git Integration Insights
Jira Git Integration streamlines development workflows by seamlessly connecting Git repositories with Jira’s project management tools.

Unlocking Git’s Power with GitLens: A Visual Studio Code Extension Guide
Explore GitLens, a Visual Studio Code extension transforming the Git workflow with features like blame annotations and time travel.
Breaking Down Barriers: How Container Technology Promotes Equity in the Tech Industry
Discover how containerization can pave the way for equity in tech. Rizel Scarlett sheds light on using container technology to promote diversity and inclusion.

Unveiling the Vulnerabilities: Threat Modeling the Death Star with Microsoft STRIDE Components
Dive into threat modeling using the Microsoft STRIDE framework, inspired by the epic world of Star Wars, and gain insights applicable to real-world cybersecurity challenges.

Meet the Influential Speakers of GitKon 2023
Discover the lineup of GitKon 2023 speakers and get a sneak peek into the exciting sessions at this year’s conference.
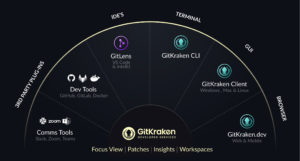
Introducing GitKraken’s New Suite of Dev Tools
Launching multiple new products, adding powerful new collaboration services, and providing developers with more for less Hey, Matt from GitKraken here. I’ll admit, we’re a

9 VS Code Extensions that Use Artificial Intelligence
Discover 9 powerful VS Code extensions harnessing AI to supercharge your coding experience. From auto-completion to code explanation, these tools are a must-have for developers.

Best Git Client for Mac
On the hunt for the ultimate Mac Git client? Check out our guide to find the perfect tool for streamlining your version control workflow.

Jira vs. Trello: Which Tool is Best for Developer Collaboration?
Project managers, rejoice! Learn everything you need to know about Jira and Trello to find the best tool for your team.

GitKraken Client and HIPAA: The Ultimate Guide for Software Developers in Healthcare
Unlock the world of secure healthcare software development with GitKraken Client On-Premise. Dive into streamlined workflows, HIPAA compliance, and a new level of data protection.

Mastering Communication: 8 Skills for Enhancing Dev to Dev Collaboration
From time zone acrobatics to code cryptography, 8 tips to achieve coding harmony.

Best Architecture for Dev Collaboration: Monorepo vs. Multi-Repo
Discover how mono and multi-repos can address your collaborative needs in software development.

GitKraken Client is Migrating From Libgit2 to the Git Executable
In a world where companies pivot for breakfast, lunch and dinner – it’s rare to see a tech house commit to a large, time intensive

Unique Challenges for Software Developers in the Public Sector
If you’re a software developer in the public sector, you’re familiar with the unique challenges public sector professionals face. From grappling with tight deadlines and

10 Video Shorts to Level Up Your Git Game
Discover the best 10 video shorts to launch yourself into a new realm of Git knowledge.

10 Best Git GUIs for Public Sector Developers
Enhance code management, collaboration, and security with these user-friendly Git GUIs for Public Sector Devs.

Team Collaboration in Git: How GitKraken Workspaces Makes the Difference
The best way to overcome your team collaboration challenges.
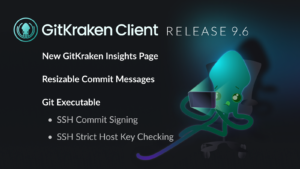
GitKraken Client 9.6: Pull Request Insights and SSH Commit Signing
See how Insights sings while SSH signs
Faster Developer Onboarding in Multi-Repos with GitKraken Client
Practical ways GitKraken Workspaces make routine tasks faster and simpler.